Building a Polly VI
locomotive from a kit
Kit 8 |
|||||
| Kit 1 | Kit 2 | Kit 3 | Kit 4 | Kit 5 | Kit 6 |
| Kit 7 | Kit 8 | Kit 9 | Kit 10 | Kit 11 | Kit 12 |
Kit 8 has the following parts
Axle Pump delivery pipe
Axle pump Bypass pipe
Left Hand lever
Large grub screws for break nut
Brake nut
Small grub screws for brake levers
Right hand brake lever
Collar
Fixings for connectors bracket
Connector bracket
Quick release connectors Bulkhead connectors and brass nuts
Axle pump feed pipe
Brake pull rods
Brake block pivots and split pins
Brake shoes blocks
Brake hangers
Brake crosshaft
Nuts and washers for pivot pins
Brake pivot pins

Kit 8 has a great number of parts that will require painting and that will take a couple of days to do properly so progress will be slow.
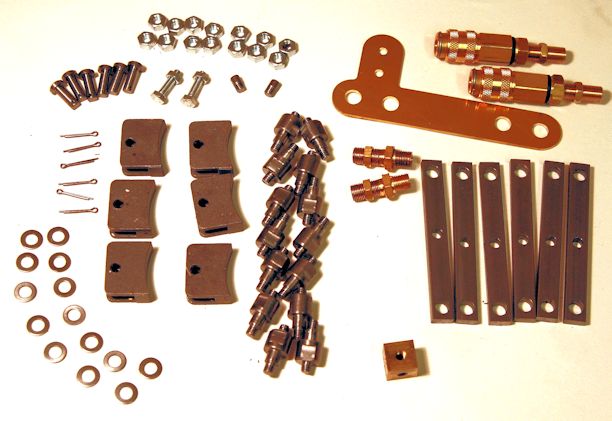
The photo shows the smaller parts that were contained in the plastic packet in the photo above.
There is also pipe work to fit but I have not yet studied the plans to where the pipes run !
Additional the brake operating rods which stretch from rear to front of the chassis were also primer coated.
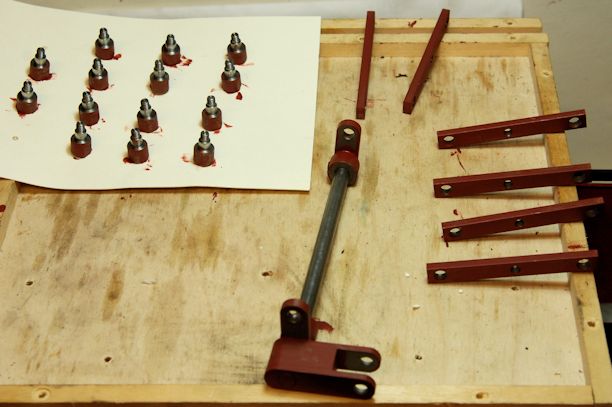
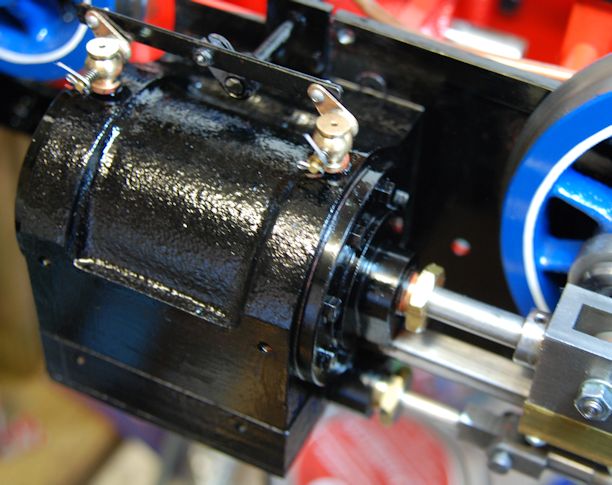
Today is was possible to top coat the many smaller parts and to undercoat the cylinders.
The cylinders have been top coated.
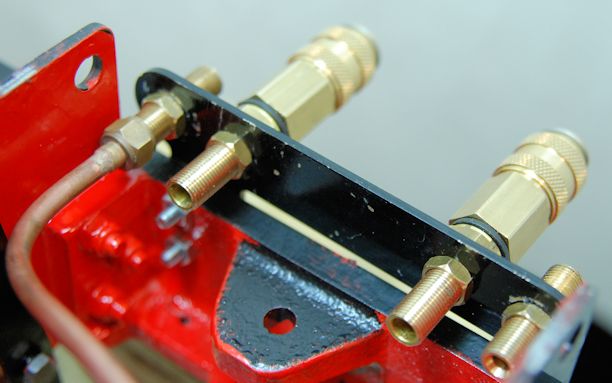
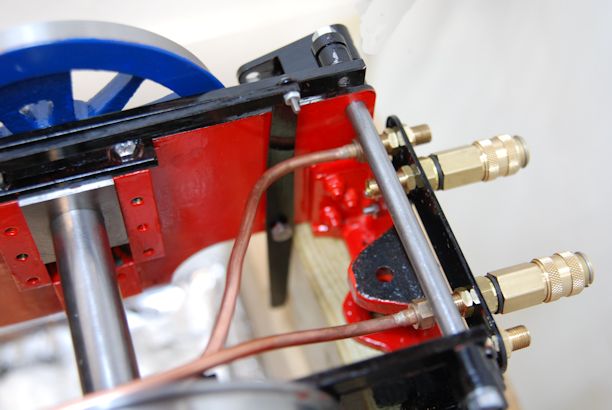
With paint dry I was able to start on the pipework. The holes in the rear bracket needed to be drill out to 8.5mm to make a nice fit to the turned brass work.
I was somewhat confused by the instructions which seem to muddle up the feed and return pipes from the pump so assumed that the feed from the tender is low pressure and the return to the bypass valve was high pressure.
So far the low pressure feed to the bottom of the pump has been installed.
The build instructions indicate that there should be a hole in the middle to support the overflow from the injector so I may need to drill a hole at a later stage with a hand held drill.
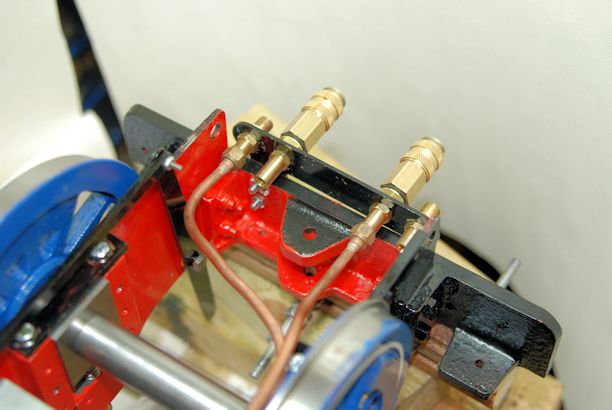
Bending the pipes to avoid kinking them is a stressful moment as the bends have of necessity to be very tight and there is no second chance.
May be I should have used a coat hanger to work out the bends first !!
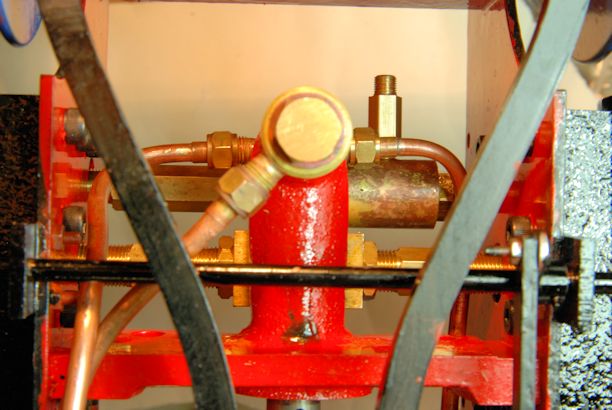
Fitting the brake parts would in my opinion have been easier if they had been done before the pipe work as actually putting the parts into their places took a bit of effort and the use of a screw driver to move the pipework out of the way a bit.
The actual hanger would in my opinion have been easier to fit when the frames were first put together as access to the hanger immaculately behind the cylinder is very difficult.
lastly had the parts been made from square or hex bar or at least two more flats added using a spanner to turn them to thier final position would have been much easier.
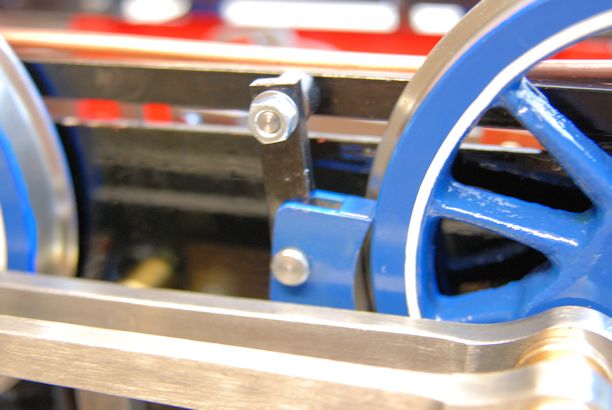
After oiling up the pivot surfaces of all the brakes the lever to the rear of the photo was operated with mole grips and the operator move quite easily after a few minutes of lifting up and down.
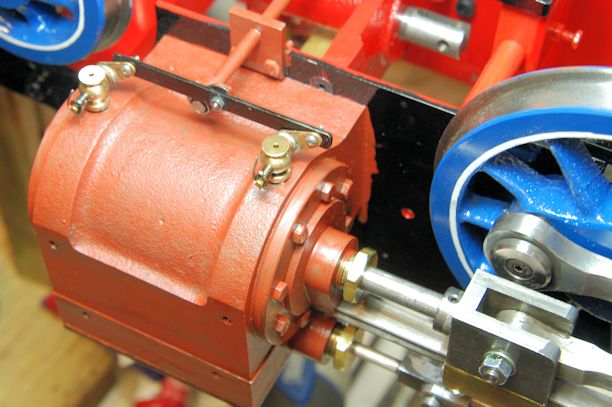
So here is the loco almost at the end of Kit 8 having just been run on air just the cylinder covers remaining.
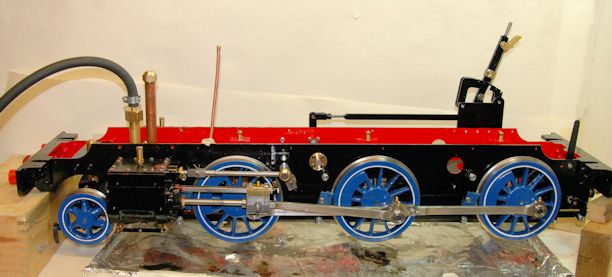
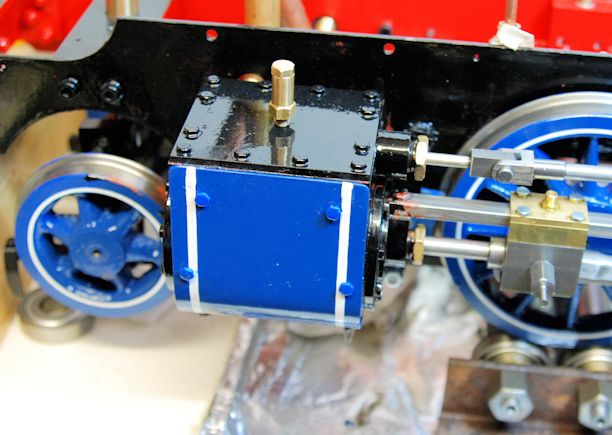
Finally I lined out the cylinder covers and today they were fitted.
Whilst the left hand side fitted fine the right hand side had to have the holes drilled out a little to allow the bolts holes to align. The increase in size was only very slight.
The bolts have still to be fully painted as they are undercoated blue at the moment.