Building a Polly VI
locomotive from a kit
Kit 3 |
|||||
| Kit 1 | Kit 2 | Kit 3 | Kit 4 | Kit 5 | Kit 6 |
| Kit 7 | Kit 8 | Kit 9 | Kit 10 | Kit 11 | Kit 12 |
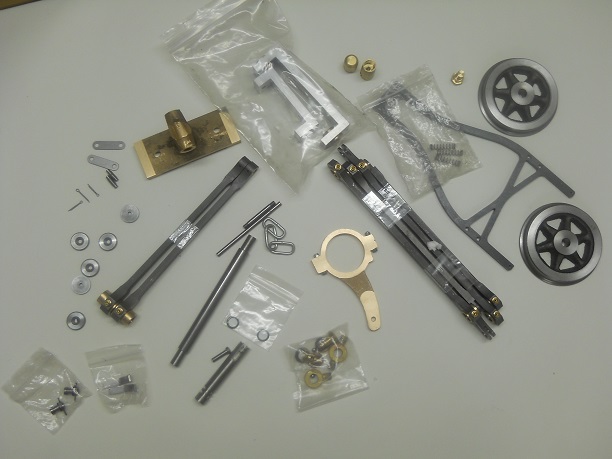
Kit 3 has the following parts
2 Banjo bolts
2 Banjos
Axle pump
Ram and "O" rings
2 Coupling Rods
4 Connecting Rods
Pump Eccentric
Crank Pins Caps
4 Split pins
Coupling Chain
2 Links
8 Oilers (already fitted)
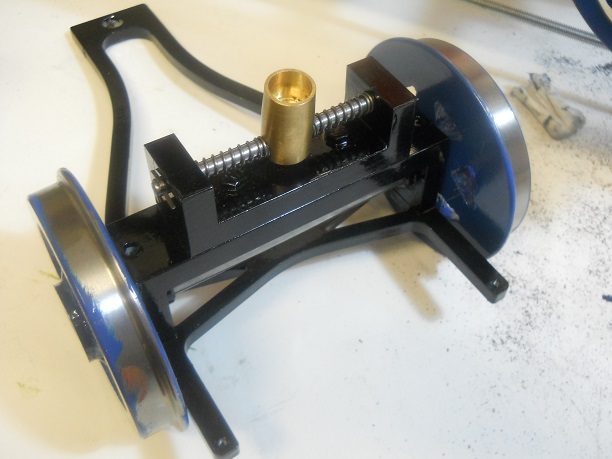
2 Wheels
3 Springs
Axle
Spring Bracket
Axle Bracket
2 Cow horns
Spring Rod
Top Nut
Vertical Spring
Sliding Nut
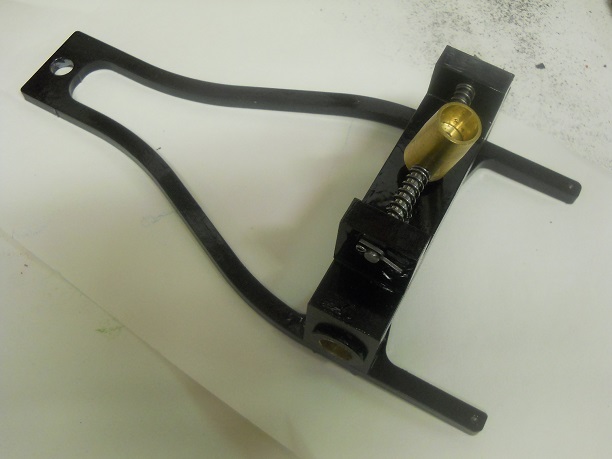
Pony Frame
Pivot Bolt
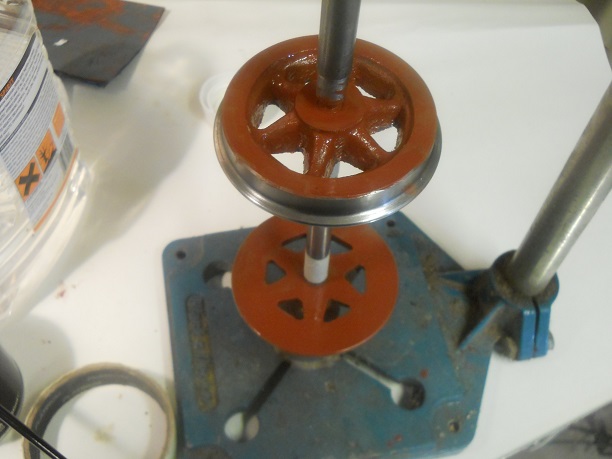
The pony axle as supplied did not have centre drill holes so as I do have a metal working workshop I was able to use my lathe to drill the missing holes in each end of the axle which are necessary to enable easy painting of the wheel as I showed in Kit 2.
Also the wheels were very tight on the reduced axle end but with the axle in the lathe an an application of wet and dry the smallest amount was removed the wheel to slide onto the axle as expected.
The painting was carried out in the same way as for the main loco wheels but without the wheels secured to the axles that will done later.
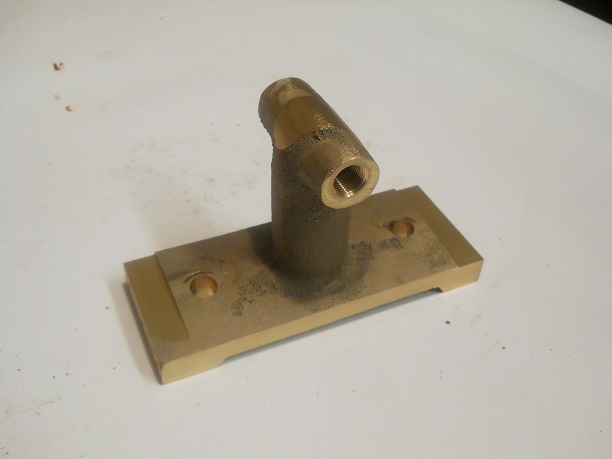
The pump also is in this kit and is required to be painted.
The machined holes must not be painted so you will see in the next photo the paper bungs !
Good ventilation is required so an extractor fan was running during the spraying and long after !
With this done the two piece matted well together and thus they were tighten up fully.
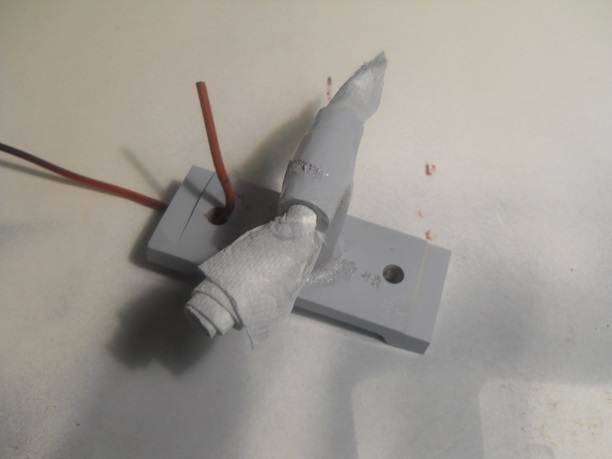
Then the other larger part of the pony unity was bolted to the matted pieces. The bearing holes were filled with kitchen roll to prevent ingress of paint.
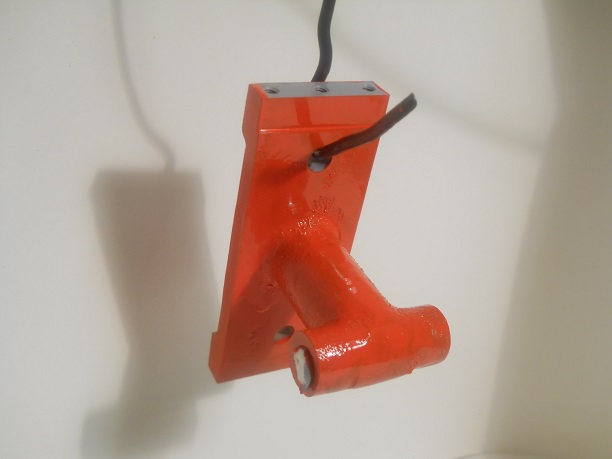
I decided to spray with the primer for special materials overall and the parts can be seen hanging up to dry..
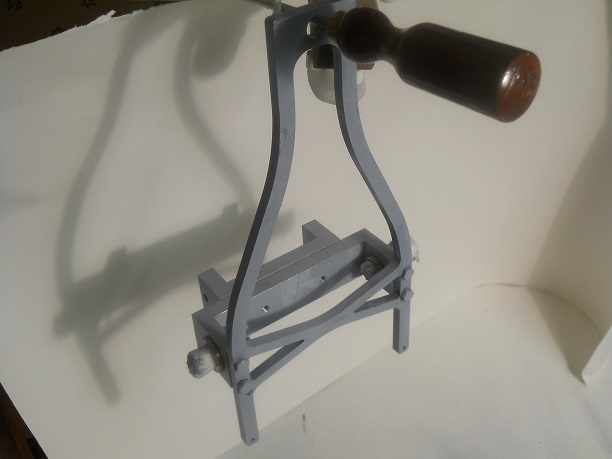
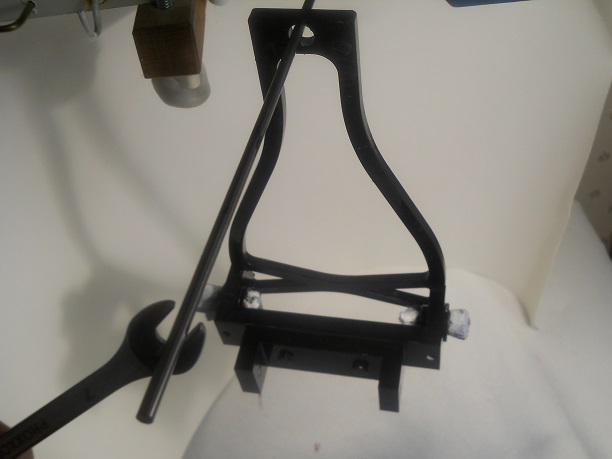
So now with the paint dry it is time to assemble to Pony. As has been seen from the above sections it has all been painted and now was the time to put a split pin on the rod, then a spring followed by the centre nut then and additional spring and finally secure with a split pin.
A small amount of the Loctite 603 adhesive was applied to the shaft and the wheel put on with a turning action and then a final 360 degree turn of the wheel up against the axle stop.
This had then to be left for the adhesive to cure.
I have used this before and there is no point rushing to the next part until the setting has well and truly taken place.

In fact I found that the bushes were not pushed fully in but about 0.5mm so adjustment was made in my workshop. If I not done this the wheel which goes on next would not sit down on the shoulder of the axle.
First a small amount of oil need to be put in the axle bushes bearing surfaces .
The the axle is slide through the bushes, a check made that there is no oil on the location where the wheel will sit and then a small amount of the Loctite 603 is applied. and the wheel put on again with turning action.
Then all you can do is hope that you have not put on too much Loctite and after 5 minutes a check is made to ensure the wheels turn!
Phew - success I achieved success and it must now be left overnight to fully cure..
The wheels still go round so on with the next bit.
The hole for the fixing of the pony to the chassis needed a bit of easing with a round file to allow the fixing bolt for go home fast.
I have started to paint the Cow Horns and Axle and they will be completed of the next few days.
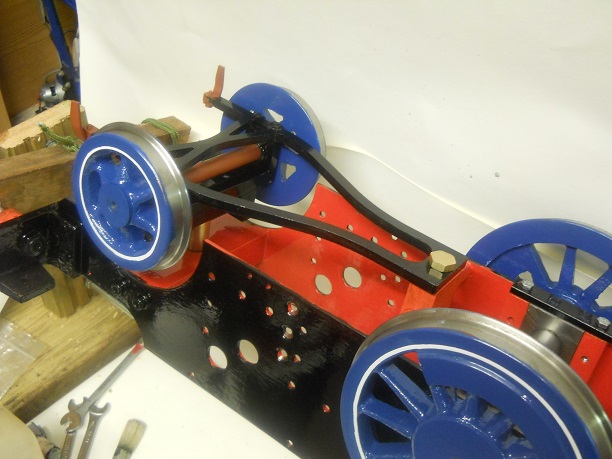
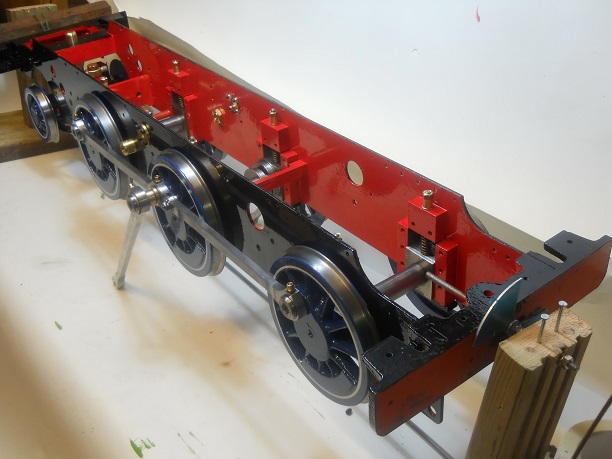
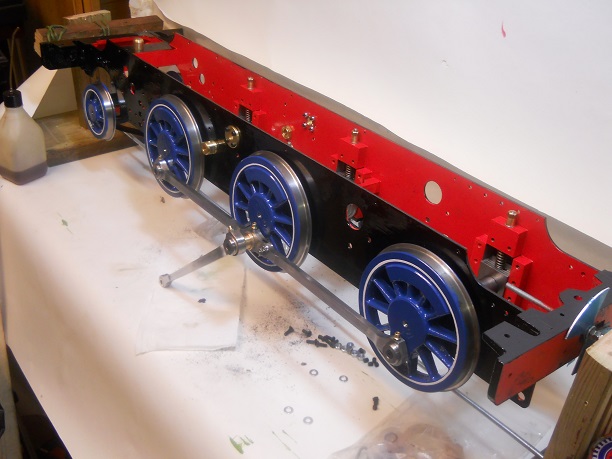
Time has come to fit the coupling and connecting rods.
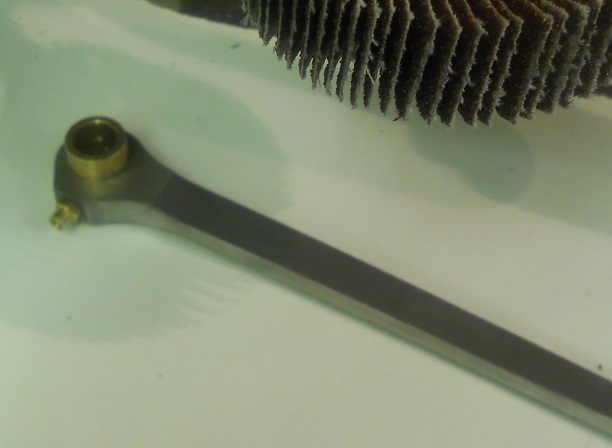
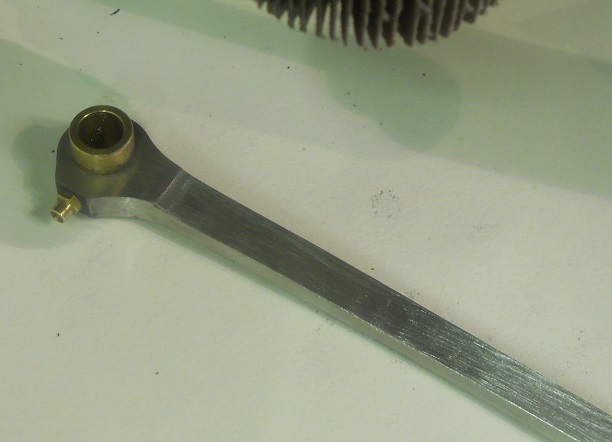
The picture does not show clearly that without attention using a flapper wheel the finish was not that of model engineering seen in clubs as it was raw from manufacture. Not that that was bad vbut even in the build notes it was suggested "You may wish to improve on the commercial finish with emery cloth or flap wheel before fitting.
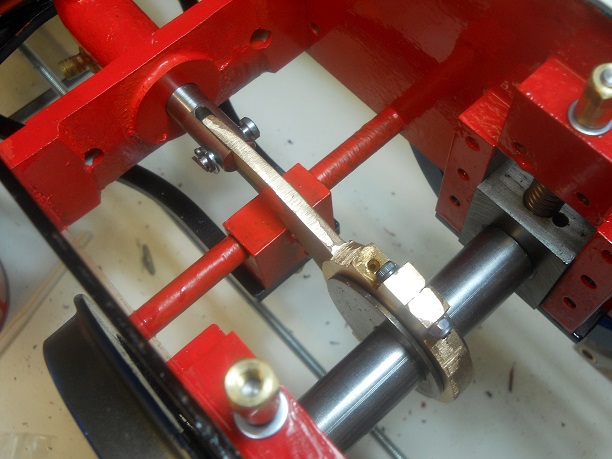
Here you can see the pump body installed. However before installation the various parts had to be put together as per the build instructions.
I found that the Compression washers to go under the bolt head were fractionally too small so had to be eased out with a small round file.
The bolt have not been tightened down but that left loose until the pipework is installed.
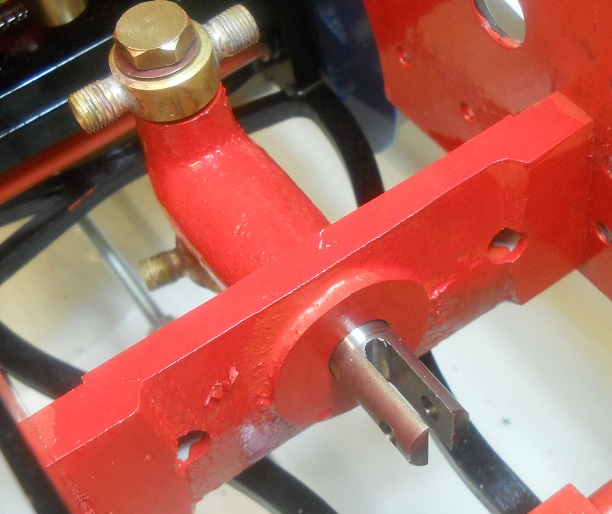
The Pump Eccentric was checked to be a good fit to the Eccentric Strap and was fitted in place.
A small mark was made on the top of the strap to ensure that is was assembled correctly as instructed in the bilud instructions.
The cottar pin was installed through the pump ram through the Pump Eccentric and as there was plenty of space a washer placed on before securing with the split pin.
The wheel assembly is now very tight to turn but as they do turn them running in will easy the stiffness.