Diary of Building Katie from Roundhouse |
||||||||||
|
||||||||||
| 9th August 2011
The two connecting rods were removed from the packet. On checking they were found to have very slights cranks in them to enable them to align with the piston and the crank. Each had the "Little Ends" a fraction under size or may be there were burrs so they should not nicely rotate on a fixing which has to tighten down onto the piston rod.
|
 |
|||||||||
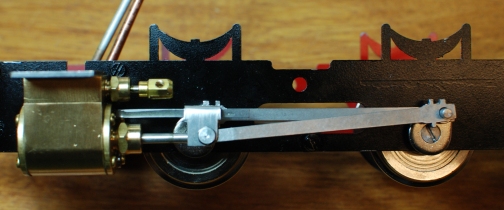
| The photo shows the cranks of both
connecting rods and how that fit to the piston rods.
Used parts count 62 including the two washers on the main cranks, two connecting rods, two crossheads two little end fixings. |
 |
|||||||||
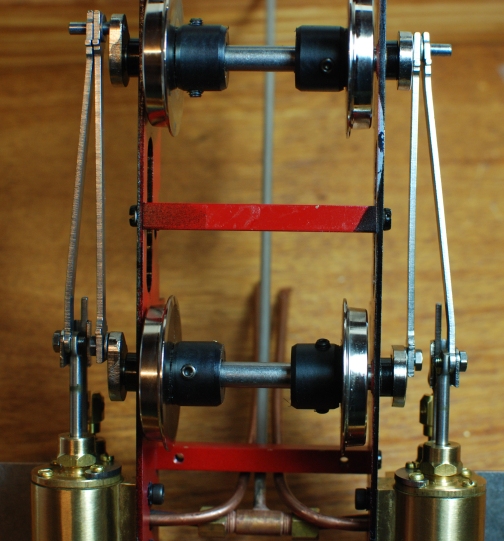
| A side view of the connecting
rods.
At this stage the moving parts were lightly oiled and checked that they rotated with a slight resistance of the pistons sliding up and down the cylinders. |
 |
|||||||||
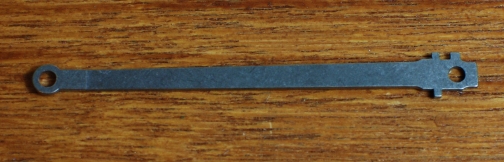
| Next comes the Valve gear.
Opposite is the excellent drawing provided by Roundhouse Engineering in their .pdf file which shows an exploded view of of the construction of the "Walschaerts" type valve gear. As you can see from the number of individual parts the assembly needs to be taken without rush |
 |
|||||||||
| Part 7, in the drawing, the return
cranks are fitted after a spacer washer is put in place. A check is made
that they are not fitted too tightly to the connecting rod that it stops
free rotation.
Used parts count 66 |
 |
|||||||||
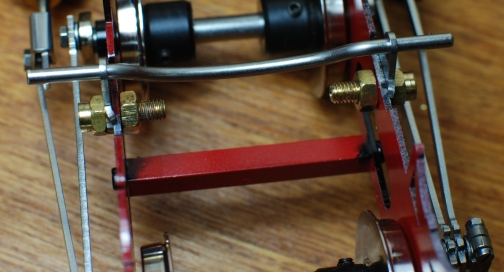
| Now we turn to part 6 which is all
part of the weigh shaft assembly. First the two little piece called "Penguin"
by Roundhouse have to have the little "arms" bend inwards to stop rotation
of the piece and they as a nice fit to the top of the frames when held in
place by the threaded part of the expansion link. With one set of arms bent
making sure that the hole at the top is in the forward location when fitted
the "Penguin" can be fitted in place. Then the weigh shaft, the curved piece
of round bar between the frames, is slide into the top hole of the penguin,
the penguin of the other side and its fitting can be attached.
There is a warning not to over tighten the brass nut else the bush might break. Used parts count 70 |
 |
|||||||||
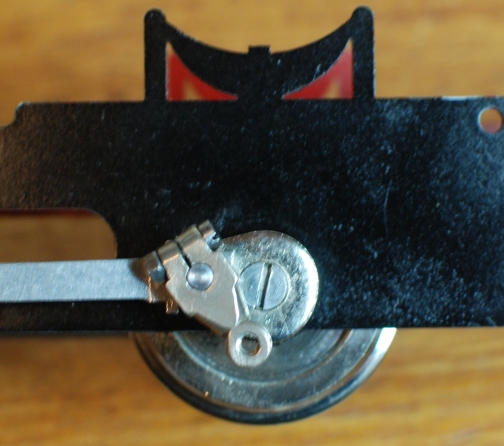
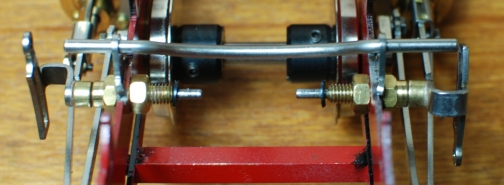
| Part 8 is then inserted into the
bush and secured with a "star washer" The fitting of the star washer was
found to be most difficult and may be that is why several are supplied in
case they are damaged !!! You can see the star washer at the end of the threaded
piece of brass.
Used parts count 72 |
 |
|||||||||
|
||||||||||