The Diary of the Building of a 5" gauge Stirling Single |
|
|
|
|
|
|
|
The boiler for the Stirling Single |
|
| Early January
2010
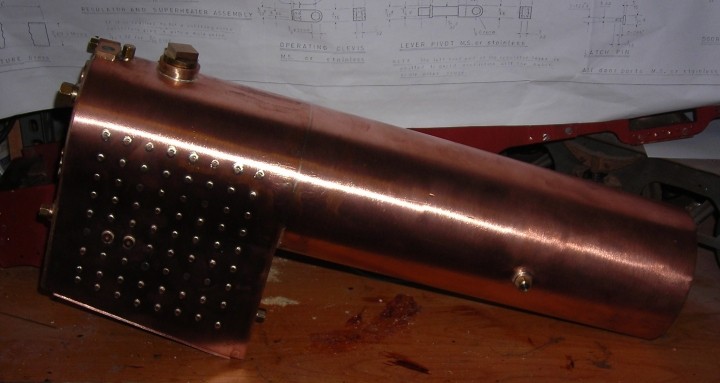
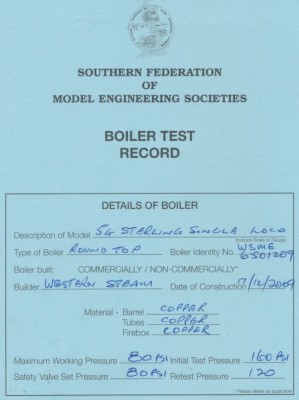
During the early summer of 2009 a decision was made to have the boiler for the Stirling single made by Western Steam of Burnham on Sea Somerset. A price was agreed and it was in late December just before Christmas that the boiler arrived with all the necessary documentation. My mentor at the Maidstone model Engineering Society in formed me that I will need to measure the boiler diameter to check that you have 1/8" clearance each side from the back to back measurement of the wheels. If it is tight, then you could consider adjusting the barrel. Check with your club regarding if you buy a boiler that it has the CE mark and anything else required so that they can test the boiler.
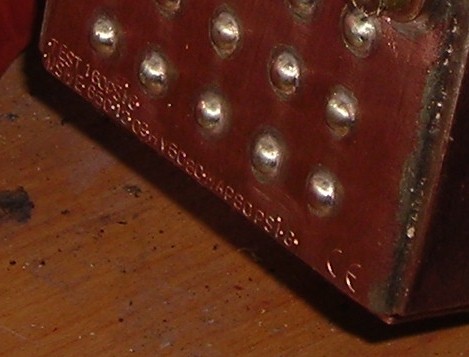
I am pleased to say that all the necessary documentation and markings are on the boiler I had made. A completed boiler is not the end of the story as one then has to make up all the plugs to go in the holes so that the club can carry out an inspection and pressure test. Making up the plugs took a couple of evenings but then I noticed several holes without threads and am wondering how I will deal with filling them prior to the tests ...
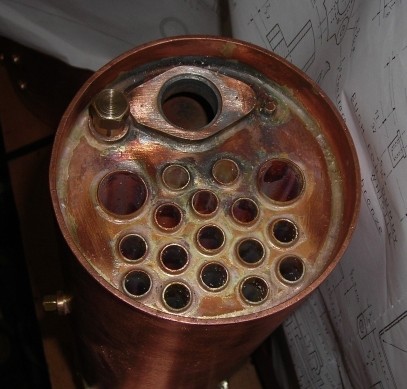
Note the plugs in place but two opening remain one on top and one at rear ... I am finding out what to do in due course. All the necessary markings. The Smoke box end and the last remaining opening!!!
|
|
| 23rd June
2010
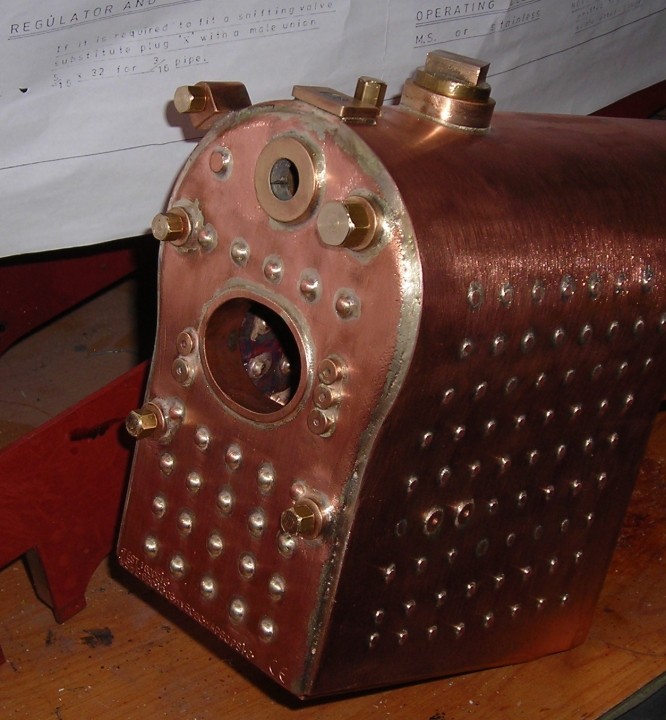
I has now been suggested an idea of how to make suitable bungs for two openings which are not threaded. They will consist of a bolt and a bar across it suitably made to swivel at and angle to the bolt shaft and filed so that it will enter the hole and then sit across the hole. The one for the smaller end is now in place with an "O" ring behind it and a brass plate and nutted tight. 25th June 2010 The big hole at the front is now also closed over. The large boss on the top with the square spanner flats has been prepared to take a 1/4" x 40 fitting with a 1/4" x 40 thread on the other end to accommodate connection to the club's test pump. So all that now remains is to tape the last remaining hole 9/32" x 32 and make up the bung. Then all the bungs will need to be have an application of PTFE tape applied. |
|
| 7th July 2010
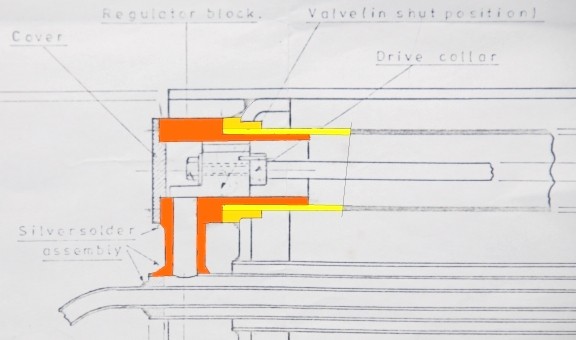
Discussing the regulator with a friend the use of a Banjo to link the out let to the super heaters were considered. However the banjo idea can't be used if the regulator is to remain in the smokebox as in the drawing below.
However to keep to a push-pull regulator as your drawings it can be done further back in the boiler where it is in the middle of the boiler. The drawing below shows how it would work. So just because a boiler does not have a dome, it does not mean one has to put the regulator in the smokebox which is very tight for space in the Stirling smokebox. With the regulator as in the drawing above, the threads do not have to be the same pitch because the regulator can be fitted to the banjo bolt and lock nutted before the bolt is screwed into the boiler as no other part of the regulator attaches to the boiler. The only check that is needed is that the regulator inlet holes are at the top when the bolt is tight. |
|
|
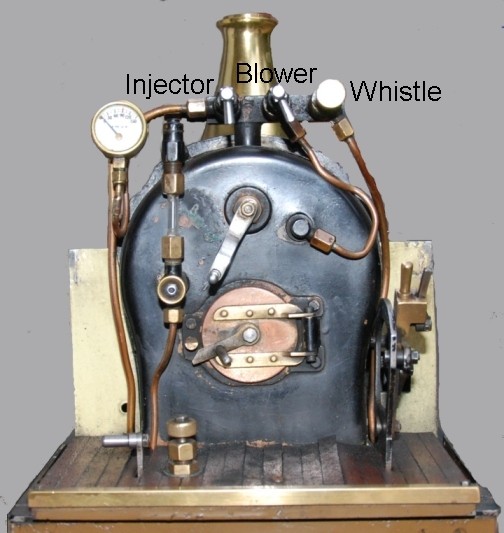
14th July 2010 I was able to photograph the rear of Martin's boiler which show the various fitting. |
|
| 17th September 2019 Looking back through the web site I came across the photo above which has a somewhat different manifold to that which is on my Stirling Single so the outlets will be used somewhat differently. |
 |
|
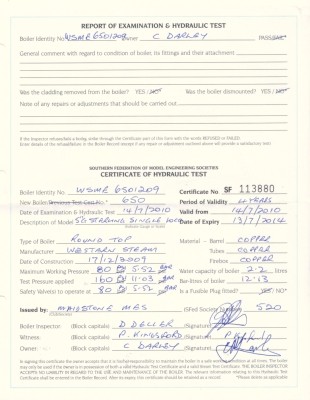
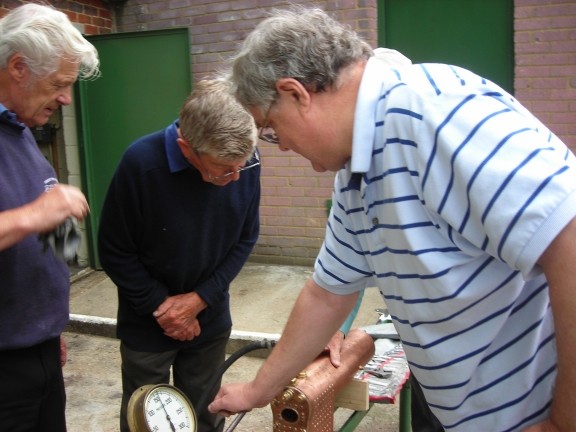
15th July 2010 The boiler was tested by MMES and now has a 4 year Hydraulic Test Certificate. Initially one of the bungs let go an "O" ring at 110psi but a simple mod of using the rubber seal in place of the "O" ring and some PTFE on the threaded shaft at the rear of the boiler and the test was successful at 160psi. On the left is Dave then to the right is Peter, Bernie's hand is on the boiler and I am pumping to maintain pressure at 160psi as the pump leaked very slightly. |
 |
|
|
|
|
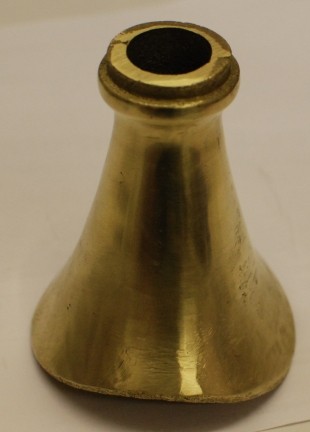
16th August 2010 I have made a start on the safety valve cover. It is bored and some of the out side has been given attention but there is still a lot more to do on it !!! |
|
| 7th December 2017 Consideration given to the boiler fitting and it was established that the Water Gauge has threads of 1/4"x40 and the two clacks also have 1/4"x40 |
|
|
23rd December 2017 Today I made up the safety valve, in Phosphor Bronze (PB), to the dimensions on the plan and used a 1/4" Stainless ball as that is the size I have used previously. It tested out on air well. The stem at the top can be cut shorter if required. I had previously made one from Brass but even using the same dimension is did not seal well and I put this down to the fact that PB is softer that Brass and thus the ball makes it own seat in the PB when the spring bounces back to the closed position after releasing pressure. The Safety Valve cover as shown above fits over the Safety valve nicely |
 |
|
|
|