The Diary of the Building of a 5" gauge Stirling Single
|
|
|
|
|
|
|
Cylinders and pistons Part 3 |
|
| 12th July 2010
Much thought has been given as to how to drill the cross ways accurately. Then a friend sent me this instruction. "I have always used the tilting vice that came with my mill. The cylinder is set in the vice with soft packing against the jaws and careful not to crush the bore. The vice can then be angled to the right angle sighted against a drill in the chuck against the side of the casting as you know roughly where the ports are and how deep they are. If you set the jaw packing level with the top edge of the top port, it is easy to see where the drill will break through. Use an end mill first to create a flat on the end of the bore big enough to cover the area of the passages. Then use a small centre drill followed by a drill to complete the passages. Then turn the cylinder up the other way and do the other passages the same way. Simple!!" |
 |
| 13th July 2010
What a day to chose to carry out this some what difficult operation. I set the cylinder is set in the vice with soft packing against the jaws and being careful not to crush the bore. I then angled the vice by sighting the side of the casting against a drill in the chuck having marked the casting with permanent marker pen to indicate the location and depth of the port. |
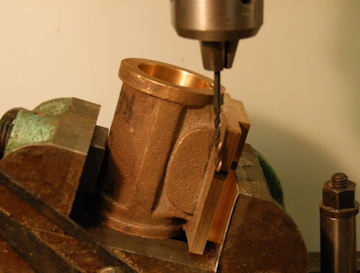 |
| I then used a SLOT DRILL to create
a flat on the end of the bore big enough to cover the area of the passages
and at right angles to the passages.
The slot drill cut to a depth of about 0.5mm |
 |
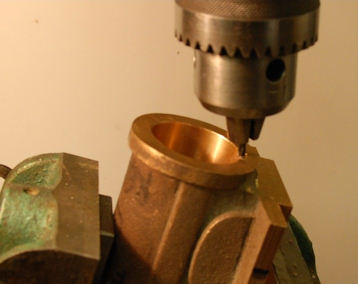
| I then used a small centre drill to
make the initial hole on the flat.
|
 |
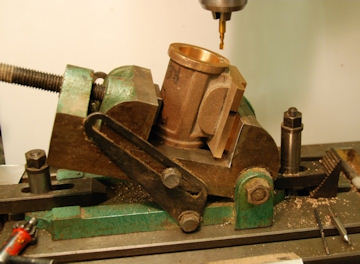
| I used a 3mm drill to complete the
drilling of the passage. The picture shows the drill in the casting to a
depth of about 33mm!!
The swarf was cleared out of there hole about every 5mm to avoid a drill breakage.
|
 |
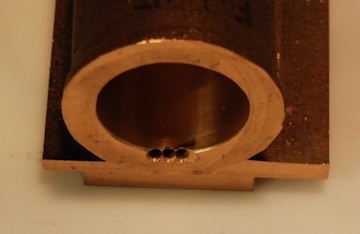
| After the first hole was drilled
the position of the chuck was moved across 3.18mm in one direction
and repeating the process and then across to -3.18mm on the DRO in the other
direction.
The process to drill all 12 holes (6 per cylinder - 3 each end) took 2 1/2 hours including setting up time. All that remains is to tidy up the drilling and the bore of the cylinder. |
 |
| 15th September 2013
Chatting with my friend at the MMES it was
decided that the exhaust port of the cylinder does not need to be angled in two
directions but merely angled in line with the ports on the face of the cylinder
and enter at the point of exhaust exit.
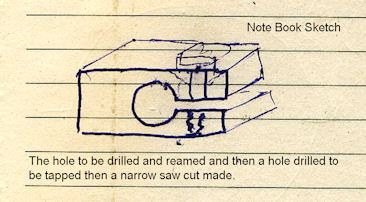
Also that firstly drill with a 3/8" drill some distance to be determined and
then across drilling made from the actual exhaust port to meet the 3/8" drilling.
CROSS HEAD I will need to check as to how the guides for the crosshead are
to be mounted and where to mount the cross head slides and how the position will be achieved.
It may be possible to take some detailed photographs of a model Stirling Single with
regards to the installation of the cylinders and also the pipe work in the smoke box.
Front and Read Cylinder Covers It is suggested that the front and rear cylinder
covers are fixed with 6BA bolts and fewer in number than using 7BA bolts as shown on one set of plans.
The cylinder cover, steam chest and the cylinder should all be linked together by
use of 6BA bolts and not 6BA studying as it will not be possible to disassemble.
It is recommended that the gap between the cylinder covers is checked to
make sure that the 6BA bolts can be withdrawn sufficiently to remove the steamed chests.
Lastly discussion took place regarding the drive for the valve and it was suggested that
I used a pinch bolt to grip the valve spindle in place of tapping a cradle which would be much more difficult.
|
 |
| 16th September 2013
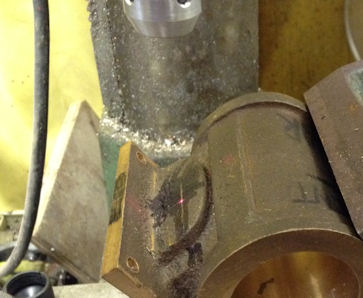
The exhaust ports were drill through. This was carried out by aligning the point of entry with a laser pointer. |
 |
| Then the surface of the exhaust port was prepared for a centre drill by the use of a small slot drill |  |
| Then the hole was drilled through with an 8mm drill. | 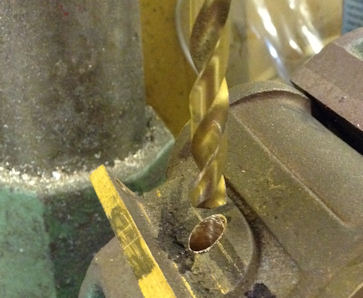 |
| I am pleased to say that the alignment was correct and the job completed. | 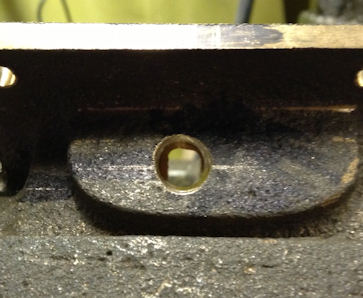 |
| The final job on the cylinder at this point was to machine a flat to take the external pipe connection. | 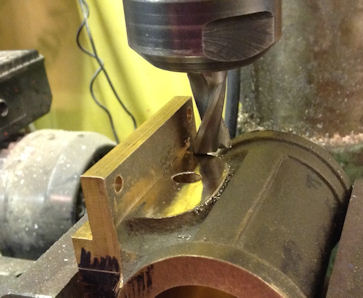 |
